
Gallery Wall Tutorial!
April 4, 2022
Creating a gallery wall in your home
One thing that I’ve noticed in the past several years that I’ve been photographing families is that most people WANT to display their family portraits on their walls. They WANT to see those beautiful photos everyday! They love the idea of creating a gallery wall.
They just have no idea where to start.
I totally get that. Just imagining all the possible options to create a gallery wall in your home can be overwhelming.…
Should they be framed? Should they be matted? What size should the prints be? But I have a black and white photo… should all the pictures be black and white? Should the frames match? Is it okay if one doesn’t match? Should I line them up? Should they be sort-of asymmetrical? But what about the canvas we bought a few years ago? I can’t hang the canvas with the frames, can I? Would that look weird? What do I hang first? Oh forget it, I need a sandwich.
At least I remember thinking all of those things myself at one time or another.
But I found, as I began offering beautiful canvases, prints, framed art, etc. in my San Antonio studio, I started looking at gallery walls in another way. In fact, I started seeing all the freedom one actually has when creating a gallery wall in your home!

And the good news? It actually can be REALLY EASY!
In this tutorial, I’m sharing how I easily created a simple gallery wall in our San Antonio home- with frames I already had- shortly after moving in. And shockingly, it didn’t take me forever. (I’m a huge procrastinator by nature. If I don’t have a perfect plan laid out, I tend to put things off until I do. And you guessed it- I rarely do!) However, my intolerance of undone tasks overcame my desire for perfect planning and I finally forced myself to JUST START.
Which is how I started this gallery wall!
I just. Started.
What does that mean? It could mean : A) gathering all of the photos or prints you’d like to display (or in my case: B) Gathering all the frames I already owned,and a couple canvases) and laying them out on the floor together. I figure most families either have a bunch of frames laying around ready to be filled with art, or a bunch of art laying around ready to be framed. You could start either way! Just start with what you have!
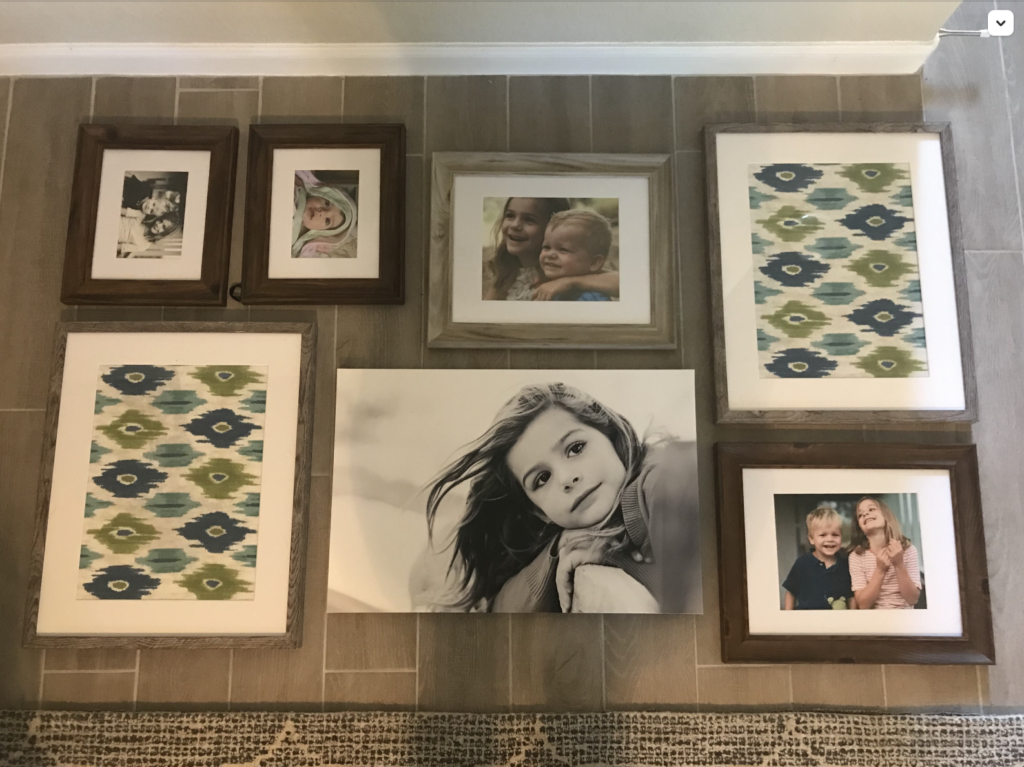
SO, here’s everything I gathered together- all laid out on the floor- right underneath the wall where it was going.
The canvases were samples I had printed when choosing my canvas vendor years ago. (Note: they’re beautifully made, and they’re still the canvases I offer at Sarah Lake Photography today!) I also had a couple other frames that I used as inexpensive artwork when staging our previous house to sell. I ended up loving them and decided they’d look great alongside the smaller frames (which I already had from who-knows-when).
What I ultimately want to do is to frame all of our family’s portraits with these insanely cool frames I offer at SLP, because they’re GOOOORGEOUS. But, as I mentioned… procrastinator right here! Plus, moving is always expensive so I wanted to just use what we already had for the time being.
At first, I thought I’d just use one canvas, because it seemed the black & white looked great with everything. (And notice that the small wood frames had horizontal photos in them, but I was thinking they’d need to be vertical in this gallery). Anyway, I just started moving things around.
I didn’t love this first arrangement– Something about the squished-in-the-middle look that didn’t seem right. So I thought Hmm… maybe everything arranged to create a large rectangle on the wall…
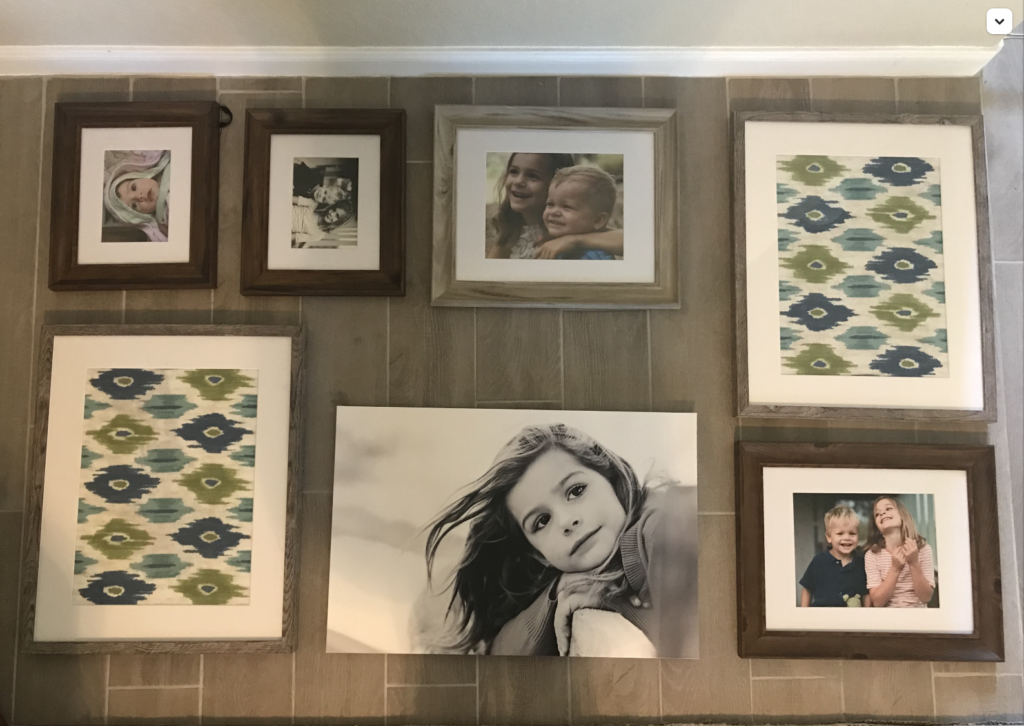
A little better, but still… not quite. The large gap in the middle didn’t feel right.
So I moved things around some more. This time, I went ahead and threw in the canvas of our son in his bright red shirt. (Ack! Bright red??? I was thinking it’d stick out like a sore thumb. But you know what? I adore it. I don’t even care that he’s in color and our daughter is in black & white. It’s our family, after all! It might not be what I’d design for a client, but I’m using what we have. I’m actually displaying our photos! And the bottom line is: it still works! If you mix color and B&W or mix finishes, the art police won’t come knocking on your door. So, do whatever you like!
You can see I sort of mirrored the left side and right side- sort of like a windmill arrangement in the middle- not even caring that I have 3 dark wood frames and one light wood one. I felt like it was coming together!
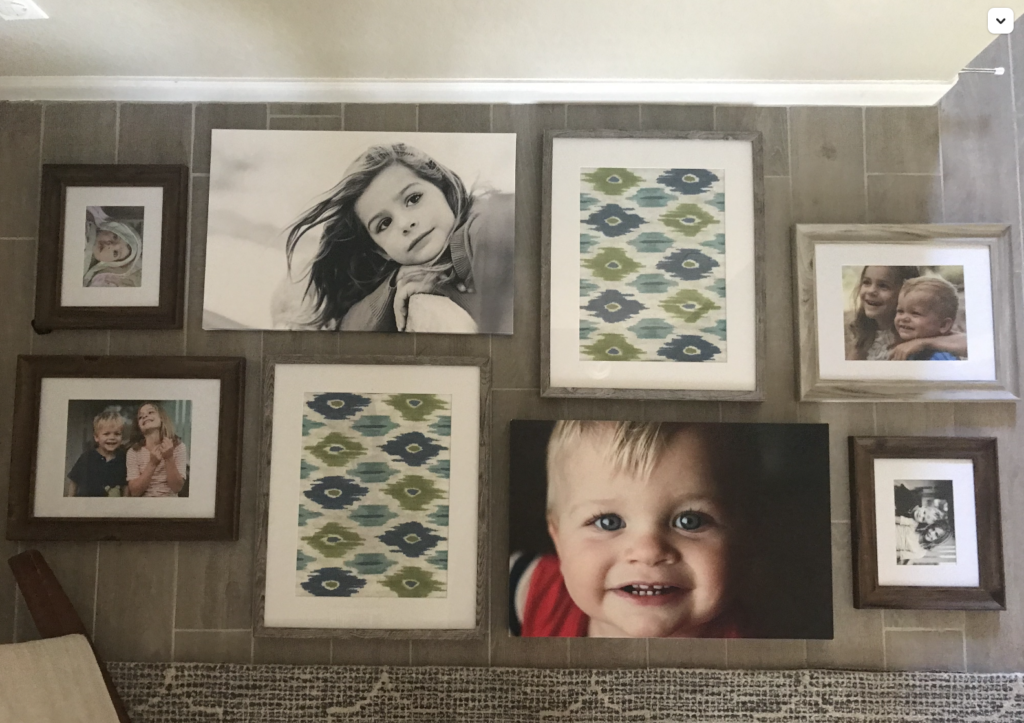
Then I thought… What if I had an imaginary line that each edge (on the left and right halves) lined up with? I liked that even more!
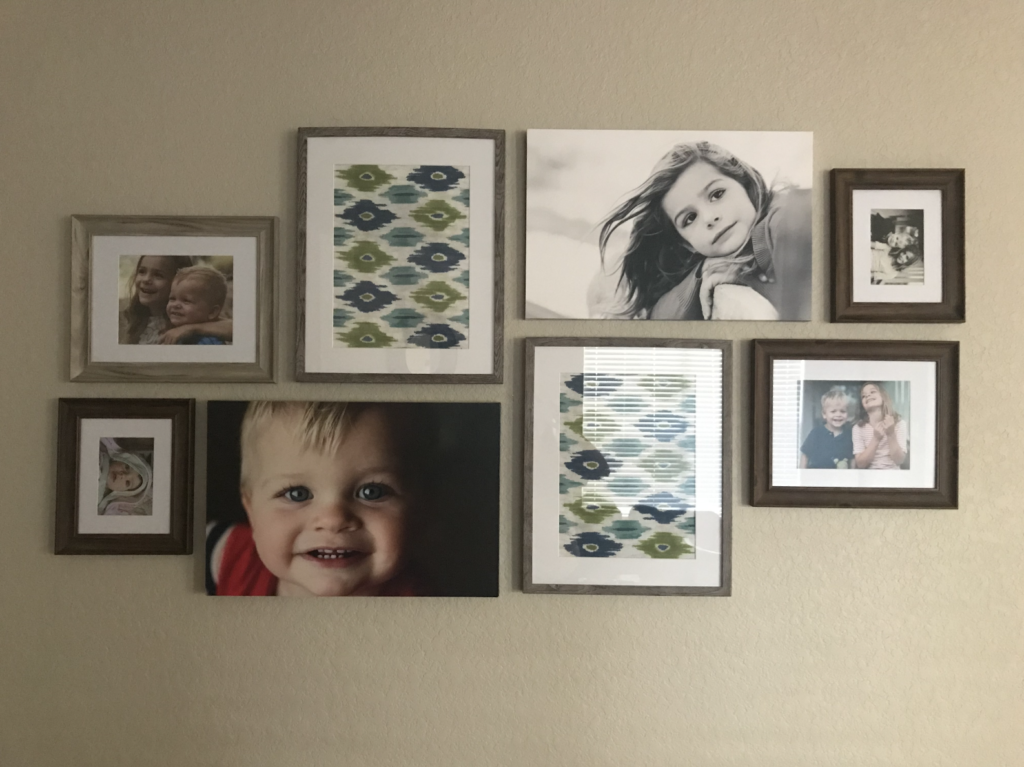
Then the portrait designer in me realized that the composition of the two canvases were such that the subjects (our son and daughter) should be on the outside of their given arrangement, not squished on the inside.
So I swapped them. I basically flipped everything over to the opposite side. That’s it!
Now comes the hard part, right? Hanging it. <gulp>
Actually, no. Ever since I discovered this genius hack for hanging frames, art, canvases, whatever- putting anything on a wall is a piece of cake. Let me show you!
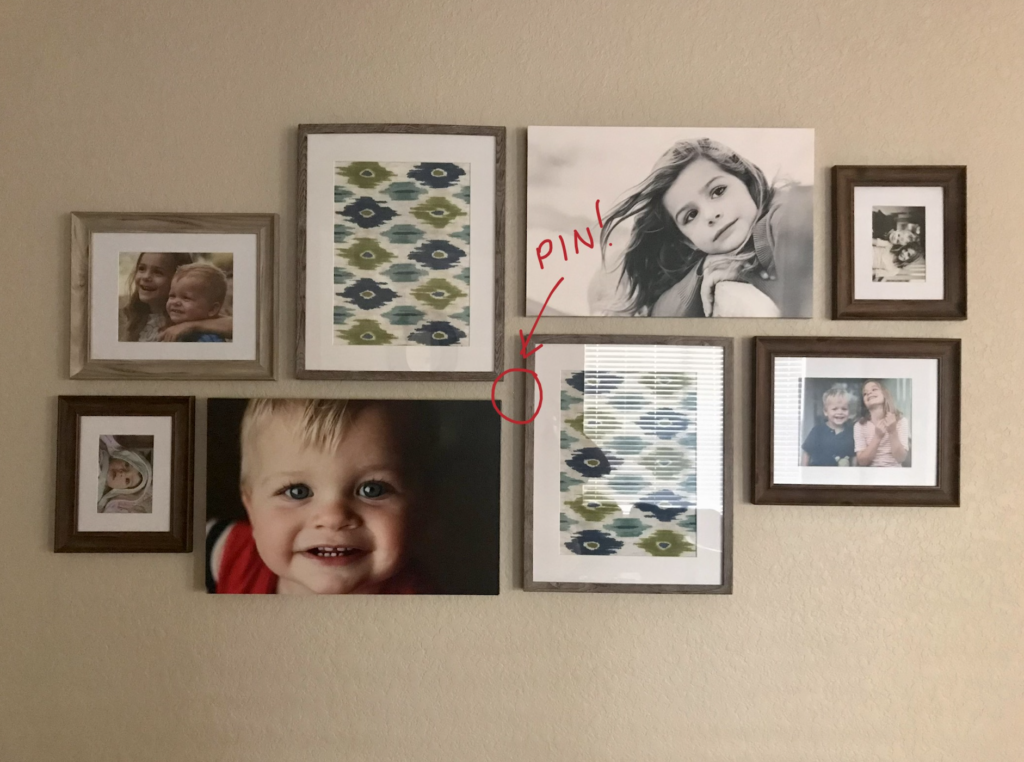
Thanks to good ‘ol Pinterest, (and this “pin” that I found a few years ago) I’ve been hanging things on my wall with my paint stick hanger ever since. I LOVE this method. Works like a charm!
In a nutshell, you drive a small screw about halfway through one end of a wooden paint stick- having the point poke through to the other side. Hang your artwork on the screw head (in case it’s not obvious- your artwork will need a wire or sawtooth hanger or something on the back of it), and then- by holding the paint stick (with the frame hanging on it) up against the wall- move it around until you know where you want it, then gently press the tip of that screw into the wall, and it will leave a tiny mark. Boom. You just marked exactly where your nail (or drywall hook, or whatever) needs to go. Couldn’t be easier.
First off: See the pin in the photo? Before I hung anything, I measured the length of my wall. (Or would that technically be the width?). I determined the middle and marked it with a pin. It doesn’t have to be exact- just enough to get the middle of your arrangement centered on your wall.
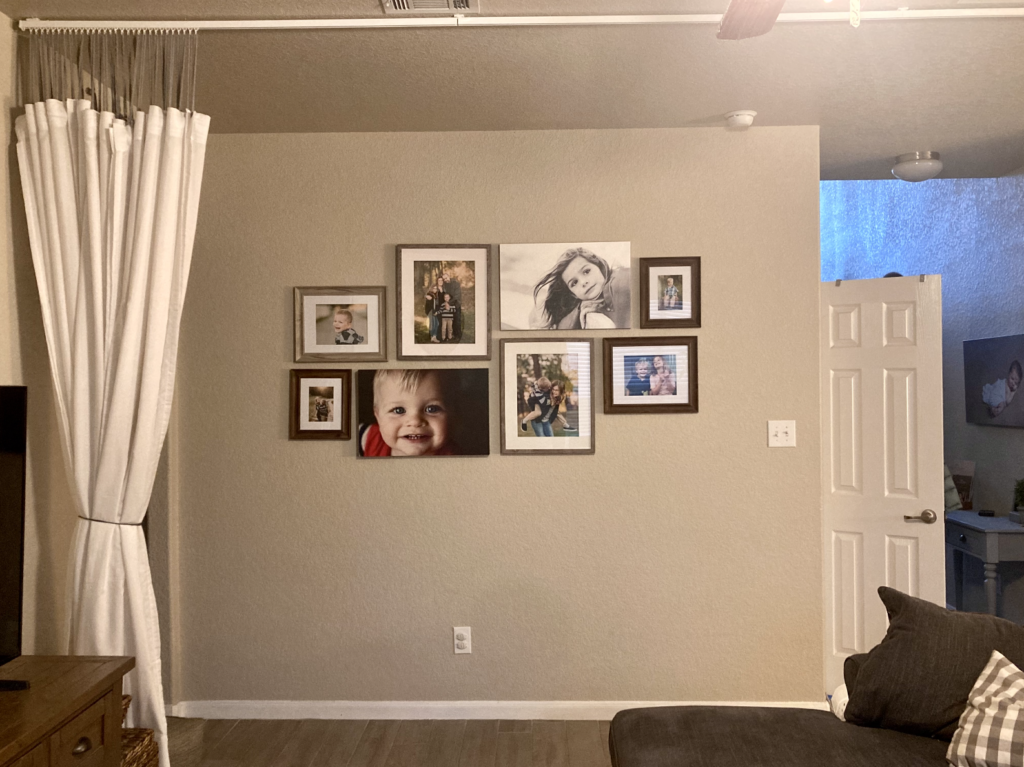
Now, speaking vertically (from floor to ceiling, I didn’t want my arrangement halfway up this wall, because it would look oddly low! The ideal placement for anything on a wall is (roughly) at the average person’s eye level. (In this case however, the middle of my whole arrangement is a little higher than that- because when toddlers visit the studio, they’ll be able to walk through this hallway and I wanted the frames just beyond their reach!)
I started by using my paint stick picture hanger to hand the top two pieces, lining up their top edges. (I made sure to center them around that pin, more or less).
Next, I hung the other two pieces underneath them- making sure to leave about the same amount of space between edge. Again, using the paint stick makes it super easy to look at it and know when it’s just right! I didn’t bother measuring the space in between the pieces- when it was even, I called it goodl!
I should note: Some of you (like my husband) might feel more comfortable using a tape measure to ensure you have the same space around/between each piece. But for me, my eye is just easier and simpler in my opinion. At a glance, I can tell whether it looks right, or looks too narrow or too wide. (And though I can barely notice a faint margin of error in these photos, it wasn’t enough to bother me- It still looked pretty even!) I don’t care if it’s not exact to the nearest millimeter, It just needs to LOOK right! I was pretty satisfied with this. 🙂
It literally took less time to hang everything than it did to decide on an arrangement. And this arrangement might not be for everyone. You might want a more structured arrangement or maybe something that looks more free-form. You may want everything to having the same-size, matching frame (which is stunning!) or it might be more important to you to display photos that are special, regardless of their size. It’s up to you.
But the lesson here is this: You don’t need any special templates or outlines on your wall. Seriously, lay everything out on your floor! Don’t be afraid to move things around. A lot. Don’t be afraid to swap out artwork in order to hang your horizontal frames vertically, or vice versa. Don’t be afraid to mix frame finishes. Definitely don’t be afraid to mix media- I have frames and canvases together, and I’d be up for throwing in any other cool memento in there, too! And don’t be afraid of putting together color and black and white prints. Likewise, don’t be afraid of hanging an entire black and white gallery wall, either. They’re YOUR photos. They’re the faces you love. Play around with it. See what looks good. When you know, you’ll know! 😉
And here is the finished gallery- after adding my printed portraits! I swapped a few older photos for some from our family’s most recent session (with the talented Jesica Lacey Photography of MD). The ones I removed went into smaller frames that are now on our mantle. 🙂
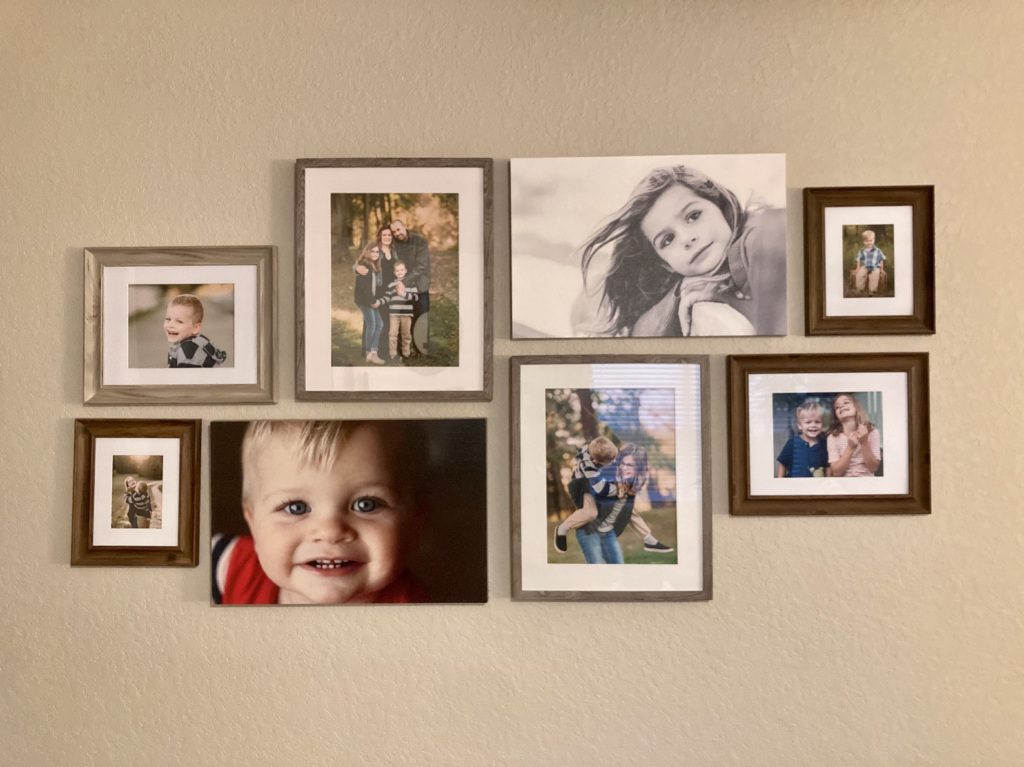
Now remember- I needed to have this display just out of reach of little hands, so you’ll notice it’s a bit higher than what’s ideal. But it still looks great!
I really hope this will help some of you fellow procrastinators finally put up those family photos in a way that looks amazing! I’d love to see your own gallery walls or other arrangements you made with your family’s photos- please share them below! And remember… You probably have a ton of photos of your children, but do they have any of YOU? Make sure that you exist in photos for your children. <3
Check out my pinterest board beow for other great tips on creating your own gallery wall!